Audio and Video Quality Tips for Virtual Learning Environments
 Jun, 22 2026
There is nothing more distracting than a teacher’s voice cutting out every few seconds or a screen that looks like it was filmed in a basement. In virtual learning environments, which are digital spaces where instruction happens remotely via internet platforms, technical glitches are not just annoying-they break the flow of education. When students struggle to hear instructions or see diagrams clearly, engagement drops instantly. You do not need a Hollywood studio to fix this. You just need to understand how light and sound behave in a small room.
We will walk through practical, low-cost ways to upgrade your setup. Whether you are a teacher in Tempe dealing with bright desert sun streaming through the window, or a student trying to focus in a noisy household, these adjustments make a massive difference. Let's look at why your current setup might be failing and exactly how to fix it without spending a fortune.
The Foundation: Lighting That Works For You
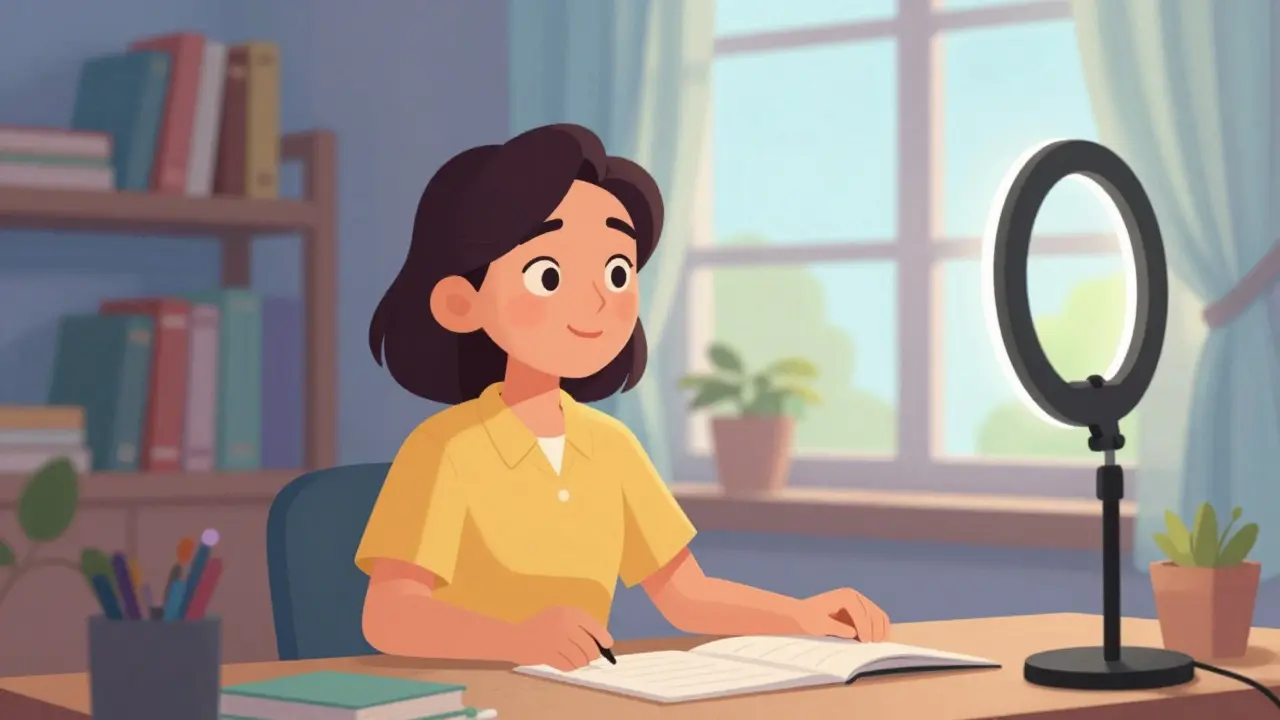
Most people think about audio first, but video quality starts with light. If your camera cannot see you clearly, no amount of software correction will save the image. The biggest mistake people make is sitting with a window behind them. This creates a silhouette effect, leaving your face in shadow while the background blows out white.
You want the light source to be in front of you. Natural light is best because it is free and flattering. Sit facing a window, but avoid direct midday sun if it causes squinting. If natural light is unavailable, you need artificial light. A simple desk lamp works, but a ring light, which is a circular lighting device that provides even, shadow-free illumination for cameras, is a game-changer for virtual classrooms. It eliminates harsh shadows under your eyes and nose, making you look more professional and approachable.
- Positioning: Place the light slightly above eye level, angled down toward your face. This mimics natural sunlight.
- Color Temperature: Aim for daylight-balanced bulbs (around 5000K-5600K). Warm yellow lights can make skin tones look unnatural on camera.
- Background Separation: Ensure there is some distance between you and the wall behind you. This prevents a flat, two-dimensional look and allows for better depth perception in the video feed.
If you are using a laptop webcam, remember that most built-in cameras have poor dynamic range. They struggle to balance bright backgrounds with darker faces. By controlling your lighting, you help the camera sensor capture a clearer image, reducing the grainy, pixelated look that makes viewers tired.
Audio Clarity: Why Your Mic Matters More Than Your Camera
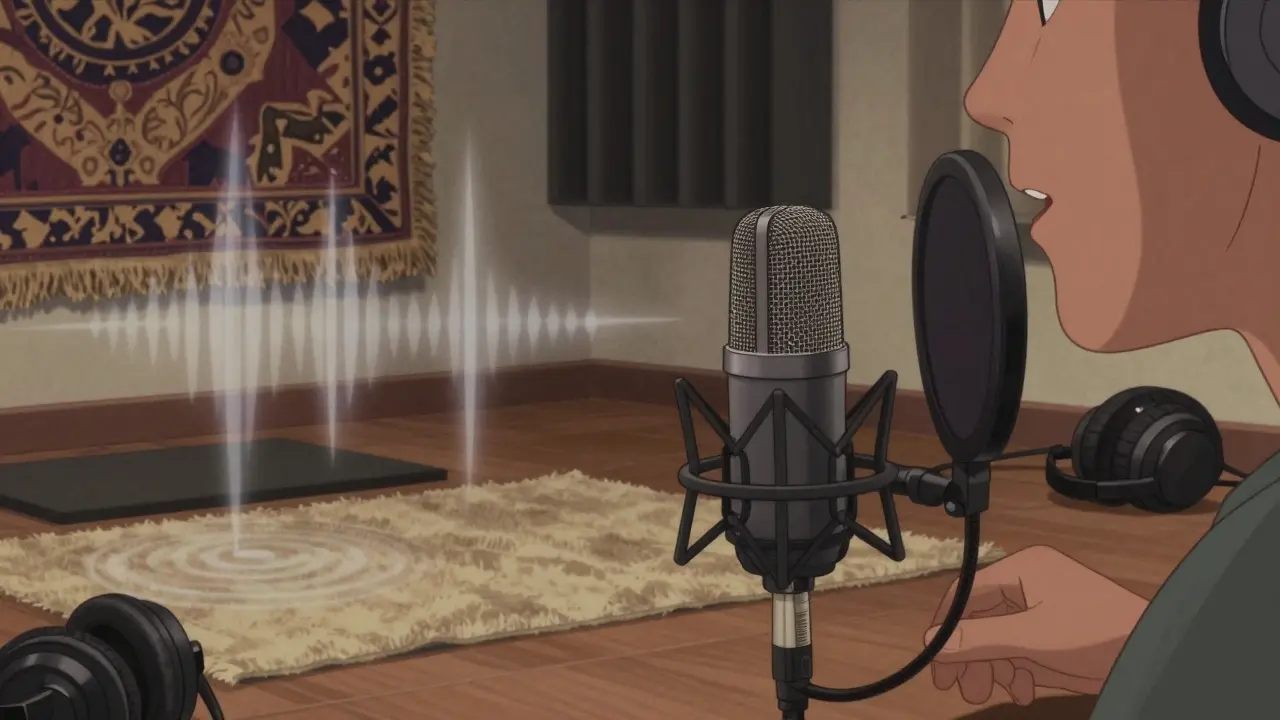
Viewers will tolerate a blurry video for a while, but they will click away immediately if they cannot hear you. Audio quality is the single most important factor in retaining attention during online lectures or meetings. The default microphone on most laptops is designed for voice calls, not for capturing clear speech over long periods. It picks up keyboard clicks, chair creaks, and air conditioning hum.
To improve audio, you need to get closer to the source of the sound-your mouth. An external microphone is the best investment you can make. You do not need a $500 broadcast mic. A USB condenser microphone or even a high-quality headset with a boom arm works wonders. The key is proximity. The closer the mic is to your lips, the less ambient noise it captures.
| Microphone Type | Cost Range | Best For | Pros | Cons |
|---|---|---|---|---|
| Laptop Built-in | $0 | Casual chats | No setup required | Picks up all room noise; distant sound |
| Headset with Boom | $20 - $100 | Students/Tutors | Close to mouth; blocks background noise | Can cause ear fatigue after hours |
| USB Condenser Mic | $50 - $200 | Teachers/Instructors | High fidelity; hands-free | Requires desk space; sensitive to room acoustics |
| Lavalier Clip-On | $30 - $80 | Moving around | Portable; consistent volume | Can rustle with clothing movement |
Software also plays a role. Platforms like Zoom, Microsoft Teams, and Google Meet now include AI-powered noise suppression features. Turn these on, but do not rely on them exclusively. AI can sometimes chop off the ends of words or make your voice sound robotic. Hardware solutions always beat software fixes.
Taming Background Noise and Acoustics
Even with a great microphone, a bare room sounds bad. Hard surfaces like drywall, glass windows, and hardwood floors reflect sound waves, creating echoes and reverberation. This makes speech sound muddy and harder to understand. You want to absorb those reflections, not bounce them around.
You can treat your room acoustically without buying expensive foam panels. Soft materials absorb sound. Hang a heavy blanket or tapestry on the wall behind you. Place a bookshelf filled with books near your desk. Use a rug on the floor if you have hard flooring. These items break up sound waves and create a drier, cleaner audio profile.
Consider your environment outside the immediate desk area. Are there pets? Roommates? Traffic outside? If you cannot control the external noise, you must control your input. Closed captions are essential here. Encourage students and colleagues to use live transcription features. This ensures that even if audio drops, the message is still received. It is an accessibility feature that benefits everyone in a noisy world.
Camera Angle and Framing Basics
How you frame yourself affects how people perceive your authority and engagement. Looking down at a laptop screen makes you appear submissive or distracted. Looking up at a ceiling-mounted camera can be uncomfortable. The ideal camera angle is at eye level.
If you are using a laptop, prop it up on a stack of books or a dedicated stand. Connect an external keyboard and mouse so you can type comfortably while maintaining eye contact with the lens. When you speak, look directly into the camera, not at the person’s face on your screen. This simulates eye contact and builds connection.
Framing matters too. You should fill the upper third of the screen with your head, leaving some headroom above. Avoid being cut off at the chin or having too much empty space above your head. A medium close-up shot (shoulders and head visible) is generally the most engaging for instructional content. It feels personal without being invasive.
Internet Stability and Bandwidth Management
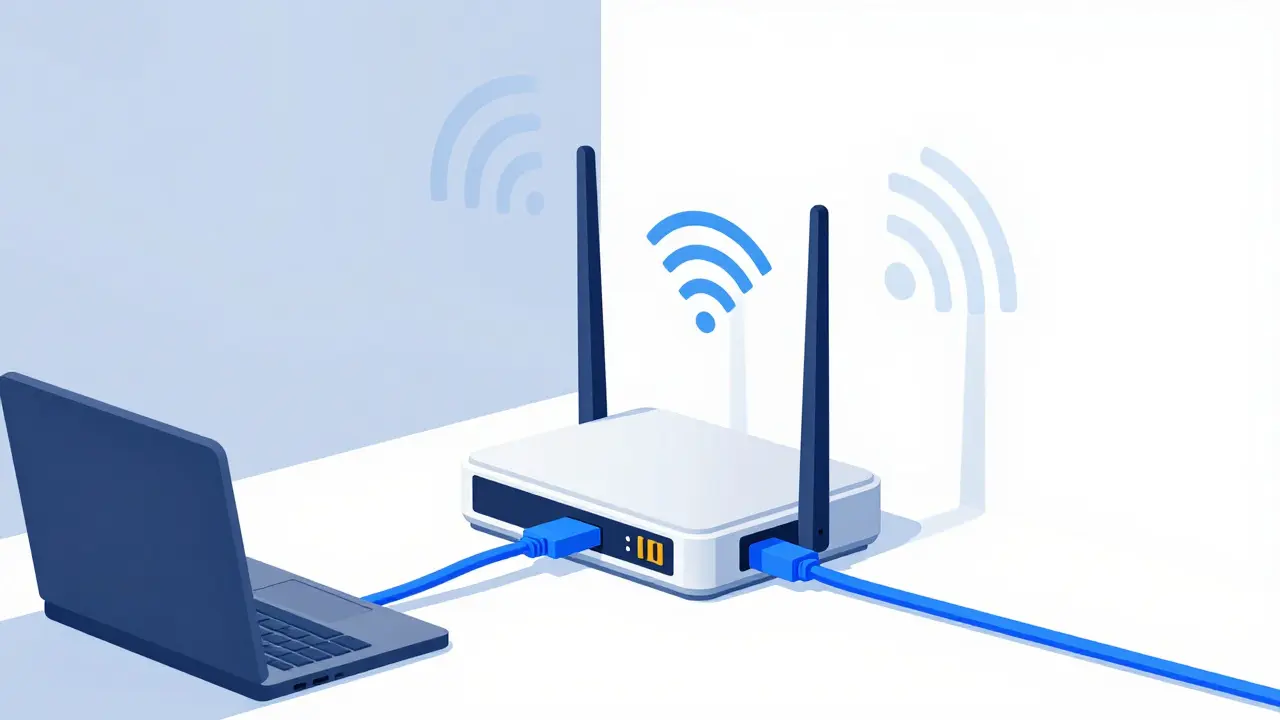
All the good lighting and microphones in the world mean nothing if your video freezes. A stable internet connection is the backbone of any virtual learning environment. Most video conferencing platforms require at least 3 Mbps upload speed for HD video. However, "at least" is not the same as "reliable."
Wired connections are superior to Wi-Fi. If possible, connect your computer directly to your router using an Ethernet cable. Wi-Fi signals can be interfered with by walls, other electronics, and neighboring networks. If you must use Wi-Fi, sit closer to the router and ensure you are on the 5 GHz band, which offers faster speeds over shorter distances compared to the crowded 2.4 GHz band.
Manage your bandwidth usage. Close unnecessary tabs and applications before joining a call. Streaming services, large file downloads, and cloud backups can consume your upload speed, causing your video to pixelate or drop frames. If your connection is weak, prioritize audio. Turn off your video feed and keep the microphone on. A clear voice is better than a frozen, silent image.
Platform-Specific Settings and Checks
Different platforms handle video and audio differently. Knowing how to tweak settings in Zoom, Teams, or Google Classroom can optimize your output.
- Test Before You Start: Always join a meeting early to test your devices. Use the platform’s built-in audio/video check feature.
- Adjust Resolution: In settings, you can often lower your outgoing video resolution to save bandwidth if your connection is spotty. This keeps the stream stable rather than dropping entirely.
- Enable Original Sound: If you are playing music or demonstrating audio clips, disable noise suppression in your app settings. Otherwise, the platform will try to remove the "noise" of your lesson.
- Use Gallery View Wisely: As a host, pin participants who are speaking or presenting. This helps others focus on the active speaker rather than scanning a grid of static images.
Regularly update your software. Developers release patches that improve codec efficiency and stability. Running an outdated version of your conferencing tool can lead to compatibility issues with newer browsers or operating systems.
Creating a Professional Backdrop
Your background tells a story before you say a word. A cluttered room with laundry piles or messy desks can distract students and undermine your professionalism. You do not need a blank white wall, which can feel sterile. Instead, aim for a tidy, neutral, or branded background.
A bookshelf with organized books, a plant, or a simple piece of art adds warmth without distraction. If your home environment is chaotic, use the virtual background feature. However, be cautious. Virtual backgrounds require processing power and can make your hairline disappear if the edge detection fails. A physical backdrop, like a plain curtain or a folded sheet, is often more reliable and looks more natural than a digital filter.
Consistency helps build brand recognition for teachers and institutions. If you teach multiple classes, keeping the same background helps students recognize your sessions quickly. It also reduces cognitive load, as they don't have to process new visual information every time they log in.
Maintaining Equipment for Longevity
Tech gear needs care. Dust accumulates on webcams and microphone grilles, degrading performance over time. Wipe your camera lens gently with a microfiber cloth before each session. Smudges scatter light and reduce clarity. Check your microphone cables for fraying and ensure connections are tight. Loose cables can cause intermittent audio dropouts that are frustrating to troubleshoot mid-lecture.
Battery life is another hidden killer. If you use wireless headphones or mics, charge them overnight. There is nothing worse than your audio dying ten minutes into a critical explanation. Keep spare batteries or charging cables accessible. Treat your equipment as a vital part of your teaching toolkit, not just a gadget.
Adapting to Different Learner Needs
Virtual learning environments serve diverse audiences. Some students may have hearing impairments, while others may have visual processing disorders. High-quality audio and video are accessibility requirements, not luxuries.
Provide transcripts for recorded sessions. Use high-contrast colors for slides and text. Speak clearly and at a moderate pace. Avoid overlapping speech. These practices complement your technical setup by ensuring that the content is digestible regardless of the viewer's individual challenges. When you invest in quality production, you demonstrate respect for your audience's time and effort.
Do I really need a ring light for online teaching?
While not strictly mandatory, a ring light significantly improves video quality by providing even, shadow-free lighting. If you cannot afford one, position yourself facing a window with sheer curtains to diffuse natural light. The goal is to have the light source in front of you, not behind you.
What is the best microphone for beginners on a budget?
A wired headset with a boom microphone is the most cost-effective solution. It places the mic close to your mouth, reducing background noise pickup. Brands like Jabra or Logitech offer reliable options under $50 that vastly outperform laptop built-ins.
How can I reduce echo in my room without buying acoustic panels?
Add soft materials to your space. Hang thick blankets on walls, place rugs on hard floors, and use bookshelves filled with books. These items absorb sound waves and prevent them from bouncing back into your microphone, reducing reverb and echo.
Should I use Wi-Fi or Ethernet for virtual classes?
Ethernet is always preferred for stability. It provides a dedicated, interference-free connection. If you must use Wi-Fi, ensure you are close to the router and connected to the 5 GHz band for faster, less congested speeds.
Why does my video look pixelated even with good internet?
Pixelation often results from poor lighting. Cameras increase gain (amplification) in low light, introducing noise that compresses poorly. Improve your lighting first. Also, check if other devices on your network are consuming bandwidth, such as streaming services or large downloads.
Is it better to turn off my video if my connection is bad?
Yes. Audio is more critical for comprehension than video. If your connection struggles, turning off your video frees up bandwidth for your microphone, ensuring your voice remains clear and uninterrupted. Participants can still follow along if they can hear you well.