Technical Requirements for Hosting a Virtual Classroom
 Jun, 26 2025
Hosting a virtual classroom isn’t just about hitting the ‘start meeting’ button. If your students drop out because the video freezes, the audio echoes, or the quiz won’t load, you’re not teaching-you’re troubleshooting. The difference between a smooth virtual class and a chaotic one comes down to one thing: the technical setup. It’s not fancy gear or expensive software. It’s the right combination of hardware, network, and platform choices working together under real-world conditions.
Minimum Bandwidth for Stable Video Streaming
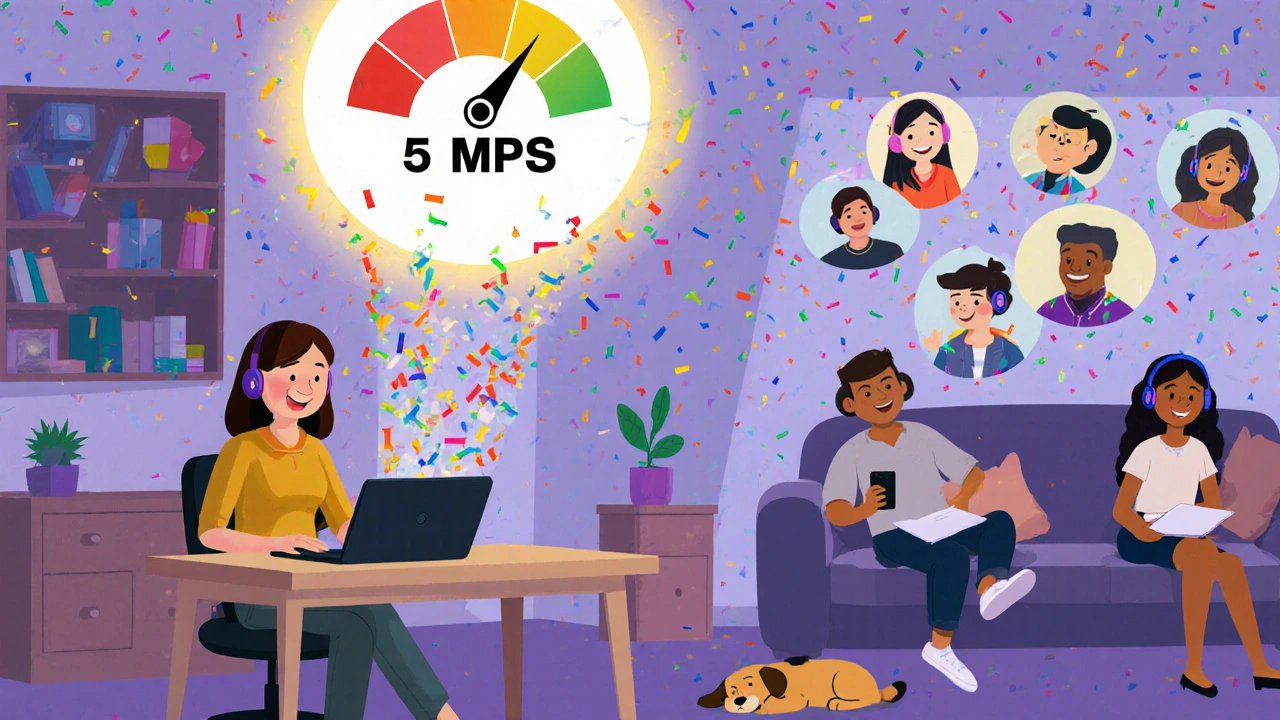
Bandwidth is the silent hero of any virtual classroom. You can have the best camera and mic in the world, but if your internet can’t handle the load, it all falls apart. For a single instructor streaming HD video to 20 students, you need at least 3 Mbps upload speed. That’s non-negotiable. Why upload? Because you’re sending video and audio out to everyone else. Most people check download speeds, but upload is what matters when you’re the one broadcasting.
Each student joining with video adds another 1.5 Mbps to your upload demand. So if 15 students have their cameras on, you’re looking at 22.5 Mbps of upload traffic. That’s more than most home internet plans offer. If you’re teaching from home, test your upload speed during peak hours-7-9 PM-when neighbors are streaming Netflix and gaming. If it drops below 5 Mbps, you’ll need a better plan or to limit video use.
Pro tip: Use platforms that support adaptive bitrate. Zoom, Microsoft Teams, and Google Meet automatically lower video quality if bandwidth drops. That’s better than a frozen screen. Always test your connection with a tool like Speedtest.net before class starts.
Choosing the Right Video Conferencing Platform
Not all video tools are built for education. Slack calls are great for quick chats. Zoom is fine for business meetings. But for a virtual classroom, you need features that keep students engaged and make teaching possible.
Zoom for Education is the most common choice because it supports breakout rooms, waiting rooms, screen sharing with annotation, and recording to the cloud. It also integrates with LMS platforms like Canvas and Moodle. Microsoft Teams works well if your school already uses Office 365. Google Meet is simple and free, but lacks advanced controls like timed breakout rooms and detailed attendance tracking.
Don’t pick based on price alone. A free tool might save money now but cost you hours later fixing technical issues. Look for:
- Breakout rooms for group work
- Screen sharing with annotation tools
- Live polls and Q&A features
- Recording and cloud storage
- Integration with your learning management system (LMS)
Test each platform with a small group of students before going live. Watch how the interface looks on a tablet, phone, and laptop. If students have to click five times to join a breakout room, they’ll give up.
Hardware That Actually Works in Real Time
You don’t need a $2,000 studio setup. But you do need gear that doesn’t lag, crackle, or drop out mid-sentence.
For the instructor: A modern laptop (Intel i5 or AMD Ryzen 5 or better) is enough. Avoid older machines with only 4GB of RAM-they’ll struggle with multiple browser tabs, video software, and an LMS open at the same time. Use an external USB microphone like the Audio-Technica AT2020 or Samson Q2U. Built-in laptop mics pick up keyboard clicks, fan noise, and echo. A good mic costs under $80 and makes you sound professional.
Camera? Use a 1080p webcam like the Logitech C920. Don’t use your phone as a camera unless you have a stable mount and good lighting. Natural light from a window beats any ring light. If you’re teaching from a dark room, you’ll look like a shadow.
For students: They don’t need top-of-the-line gear. But they do need a working mic and camera. If your school provides devices, make sure they’re not running Windows 7 or Android 8. Outdated OSes don’t support modern web browsers needed for virtual classrooms.
LMS Integration: Connect the Tools
A virtual classroom isn’t just a Zoom call. It’s a system. You need to post assignments, track attendance, hand out quizzes, and give feedback-all in one place. That’s where a Learning Management System (LMS) comes in.
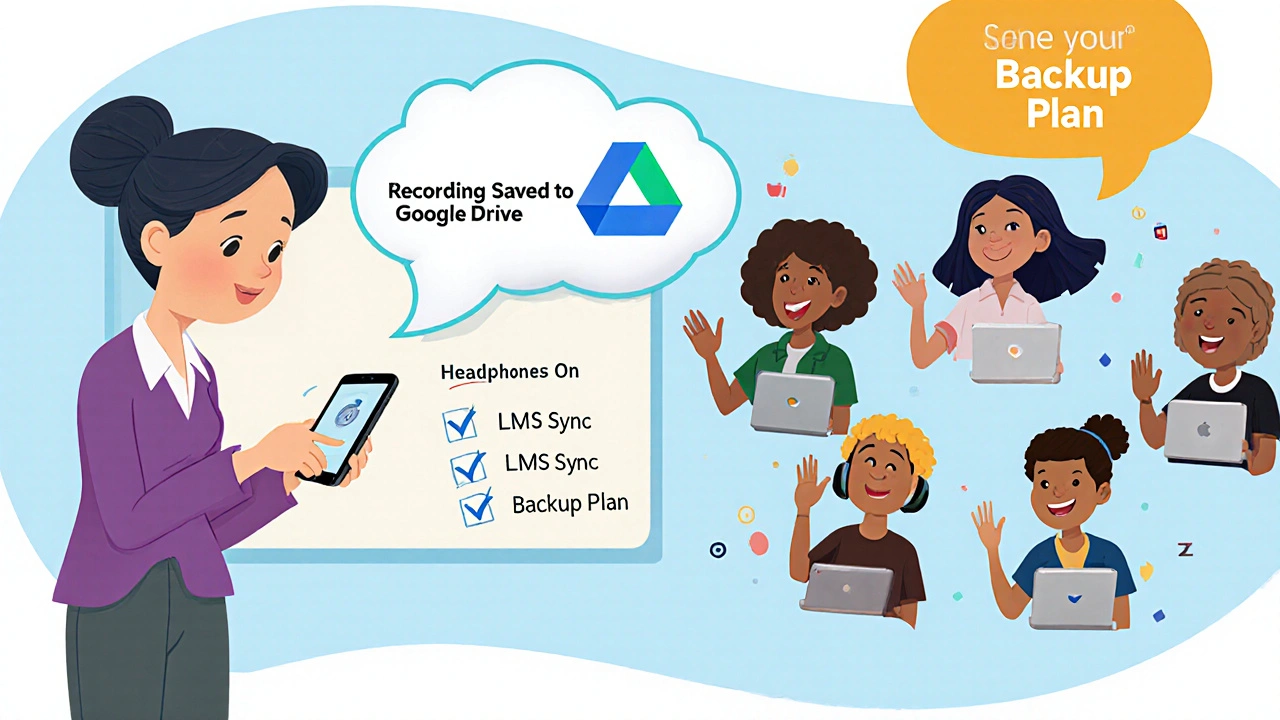
Platforms like Canvas, Moodle, Blackboard, or Google Classroom should connect directly to your video tool. Zoom’s LMS integration lets you auto-create sessions from your course calendar. Attendance is logged automatically. Recordings are saved to the LMS, so students can review later.
If your LMS doesn’t integrate with your video tool, you’re doing double work. You’ll have to manually email links, copy-paste attendance lists, and upload recordings one by one. That’s not teaching. That’s admin work.
Check if your LMS supports LTI (Learning Tools Interoperability). That’s the industry standard for connecting tools. If your school uses Canvas, confirm that Zoom or Teams has an LTI app installed in your admin panel. If not, ask your IT department to install it.
Audio and Video Best Practices
Audio problems are the #1 reason students quit virtual classes. If they can’t hear you, they leave.
- Always use headphones. They stop echo and feedback. If you speak into a mic while speakers are playing, students hear an echo of themselves.
- Mute yourself when not speaking. Even background typing or dog barking can be distracting.
- Use a quiet room. Close windows, turn off fans, and avoid hard surfaces that reflect sound. A rug or curtain behind you helps.
- Test your setup before class. Do a 5-minute mock session with a colleague. Record it. Play it back. Does your voice sound clear? Is there background noise?
Video quality matters too. Don’t teach in front of a messy wall or a bright window behind you. That creates a silhouette. Sit facing a light source. Use a simple backdrop. Keep your face well-lit.
Backup Plans and Contingencies
Technology fails. Always have a backup.
- If your internet goes down, use your phone’s hotspot. Most plans have enough data for 30-45 minutes of video.
- Record every session. Even if students can’t join live, they can watch later.
- Have a phone number or text group ready to send updates. If the platform crashes, send a quick message: “Class moved to Google Meet. Link here.”
- Save all materials in two places: the LMS and a cloud folder (Google Drive or Dropbox). Don’t rely on one location.
Test your backup plan once a month. Don’t wait until the day of the big lesson to find out your hotspot doesn’t work.
Student Access and Equity
Not every student has high-speed internet or a quiet room. Some use their phone for everything. Others share a laptop with siblings. Your tech setup must work for them too.
Offer audio-only options. If a student can’t stream video, they should still be able to join by phone or mute their camera and use the chat. Record every class so they can watch later without needing real-time bandwidth.
Provide a low-bandwidth version of your materials. PDFs instead of videos. Text summaries instead of slides. Make sure your LMS works on mobile browsers. If students can’t access assignments on their phone, you’re excluding them.
Ask your students directly: “What’s your biggest tech challenge?” You’ll be surprised what you learn.
Security and Privacy Settings
Virtual classrooms are public spaces. You need to lock them down.
- Always require a password to join. Never share the link publicly.
- Enable the waiting room. Let you approve each student before they enter.
- Disable screen sharing for participants unless they need it for a presentation.
- Turn off private chat unless you’re using it for group work.
- Use the latest version of your software. Outdated versions have security holes.
Don’t record to local storage unless you’re on a secure network. Cloud recording is safer and easier to manage. Make sure students know when recording is active. Some states require you to announce it.
Check your school’s FERPA or GDPR policies. Some platforms store data in countries with weaker privacy laws. Stick to providers that host data in the U.S. or EU if you’re teaching under those rules.
Final Checklist Before Every Class
Here’s what you should check every time you teach:
- Internet upload speed is above 5 Mbps
- Microphone and camera are working (test with a recording)
- Headphones are plugged in
- LMS is synced with your video platform
- Class link and password are ready to send
- Recording is turned on
- Backup plan is ready (hotspot, phone number, cloud backup)
- Students have been reminded to mute when not speaking
Do this checklist every time. Even if you’ve taught 100 classes before. Technology doesn’t care about your experience. It only cares if you’ve checked the basics.
What internet speed do I need for a virtual classroom?
For one instructor streaming to 20 students with video on, you need at least 3 Mbps upload speed. Add 1.5 Mbps per student with video enabled. Aim for 5 Mbps upload to handle spikes and background tasks. Test your speed during peak hours using Speedtest.net.
Can I use Zoom for free to teach a virtual class?
Yes, but with limits. The free version of Zoom allows 40-minute sessions with more than 2 participants. That’s not practical for a full class. For teaching, use Zoom for Education, which is free for schools and offers unlimited meeting time, breakout rooms, and LMS integration.
Do students need webcams to join a virtual class?
No. Students can join with audio only or via phone. Many students use phones or share devices. Always allow audio-only participation and record sessions so they can watch later. Requiring video excludes students with poor internet or privacy concerns.
What’s the best LMS for virtual classrooms?
Canvas and Google Classroom are the most user-friendly for educators. Canvas offers strong LTI integration with Zoom and Teams, detailed grading tools, and mobile access. Google Classroom is simpler and works well if your school uses Gmail and Drive. Avoid platforms that don’t connect to your video tool-you’ll waste time managing separate systems.
How do I prevent Zoom bombing or unauthorized access?
Enable the waiting room, require a meeting password, and disable participant screen sharing unless needed. Don’t post meeting links on public forums. Use unique meeting IDs instead of personal ones. Update your Zoom app regularly to patch security flaws. Always announce when recording starts.
Megan Blakeman
October 29, 2025 AT 23:06Ugh, I just had a class where the audio echoed like we were in a cave… I didn’t even know my mic was on until a kid asked if I was whispering to my cat 😅
Headphones. Just. Use. Them. Seriously. It’s not that hard.
Akhil Bellam
October 30, 2025 AT 15:22Let me guess-you’re using a $20 Logitech webcam and calling it ‘professional.’ Please. If your students can’t see your face clearly, you’re not teaching-you’re performing a shadow puppet show with a laptop. And don’t even get me started on ‘audio-only’ options. That’s not equity, that’s surrender. Real education demands bandwidth, not compromise.
Also, if you’re still using Google Meet for anything beyond a quick check-in, you’re doing your students a disservice. It’s a glorified Zoom Lite for people who think ‘engagement’ means not muting themselves.
Amber Swartz
October 31, 2025 AT 11:58I’m crying. I really am. I just spent 45 minutes troubleshooting Zoom because a student joined from a phone with no headphones and now the whole class sounds like a haunted radio. I didn’t sign up for this. I signed up to teach Shakespeare, not manage a tech support hotline. 🥲
And don’t even get me started on the parents who think ‘virtual’ means ‘I’ll just leave my kid in the car while they listen.’
Robert Byrne
October 31, 2025 AT 18:16Stop saying ‘just use headphones.’ That’s not a solution-that’s a band-aid on a ruptured artery. If your infrastructure can’t handle 3 Mbps upload without melting down, you’re not a teacher-you’re a glitch waiting to happen.
And yes, I’ve seen teachers use their phones as webcams. You think that’s cute? It’s not. It’s lazy. Your students deserve better than a shaky, overexposed selfie of your kitchen wall. Get a tripod. Get a mic. Get your act together.
Also, if your LMS doesn’t integrate with your video platform, you’re not ‘teaching.’ You’re doing paperwork. And that’s not teaching. That’s administrative hell.
Tia Muzdalifah
November 2, 2025 AT 08:49yo i just wanna say i teach from my couch with my cat on my lap and my phone as a mic and somehow we still get through it 😅
my kids are chill, we laugh when the audio cuts out, we do voice notes instead of quizzes sometimes, and honestly? they learn more than the ones in the fancy setups.
tech is a tool, not the teacher. you don’t need a studio to make magic.
Zoe Hill
November 3, 2025 AT 01:06Thank you for this!! I’ve been trying to tell my district for months that we need to stop assuming all students have Wi-Fi at home…
One of my students uses the library’s free Wi-Fi and sits in the parking lot to join class. I send PDFs, I record everything, and I let them call in if they can’t get video. It’s not perfect-but it’s fair.
Also, I use a $30 USB mic and it’s a GAME CHANGER. My voice doesn’t sound like I’m talking through a tin can anymore 😊
Albert Navat
November 3, 2025 AT 12:12Let’s cut through the noise: if your upload speed is below 5 Mbps, you’re not ready to teach live. Period. The ‘audio-only’ band-aid doesn’t solve systemic underinvestment in rural infrastructure-it just lets you feel better while you’re failing your students.
And stop romanticizing ‘low-tech’ solutions. That’s not equity-that’s resignation. We need broadband as a civil right, not a privilege. Your ‘workaround’ is a symptom of a broken system.
Also, if you’re still using Zoom’s free tier, you’re playing Russian roulette with your class. 40 minutes? That’s not a lesson-that’s a hostage situation.
King Medoo
November 5, 2025 AT 08:19I’ve seen it all. Teachers using TikTok filters during live lessons. Parents walking in mid-class. Students with their cameras off and their mics on-blasting anime soundtracks into the void.
And you wonder why education is collapsing?
It’s not the tech. It’s the lack of discipline. The lack of boundaries. The lack of respect.
Turn off the cameras? Fine. But then require written participation. No audio? Fine. But require daily written reflections. No bandwidth? Fine. But then don’t expect them to be ‘engaged.’
Stop making excuses. Start setting standards. 🚫📱
Rae Blackburn
November 5, 2025 AT 11:44They’re watching you
Every keystroke. Every pause. Every time you look away from the camera
They’re recording your classes without permission
They’re uploading them to TikTok with captions like ‘this teacher is a fraud’
Your LMS isn’t secure
Your school’s IT department is asleep
They’re harvesting your voice data
And you’re still using Zoom?
Wake up
LeVar Trotter
November 7, 2025 AT 01:35One thing I’ve learned after 12 years of remote teaching: the best tech setup is useless if you don’t build trust first.
Students don’t care if your mic is a Shure or a Walmart special-they care if you remember their name. If you check in on them. If you make space for their chaos.
I’ve had kids join from shelters, from foster homes, from cars. They don’t need perfect bandwidth. They need to feel seen.
So yes-test your upload speed. Yes-use headphones. But also: smile when you say ‘good morning.’ Ask how their weekend was. Let them know you’re human too.
That’s the real LTI.
Tyler Durden
November 8, 2025 AT 19:11Okay I’ve been doing this for 8 years and I’ve tried EVERYTHING-webcams, mics, routers, mesh networks, fiber, hotspots, you name it
Here’s the truth: the best virtual classroom isn’t about the gear
It’s about the rhythm
You need to know when to talk, when to pause, when to mute, when to let the silence breathe
When to say ‘I don’t know’ and mean it
When to say ‘let’s try this again’ and mean it
When to turn off the video and just say ‘I’m here’
Technology doesn’t teach
People do
And if you’re spending more time fixing your router than connecting with your students
You’re already lost
So check your bandwidth
But check your heart too
❤️